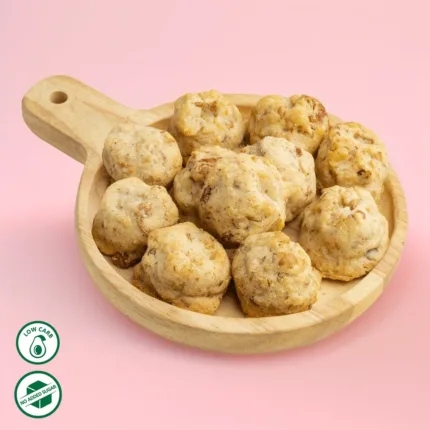
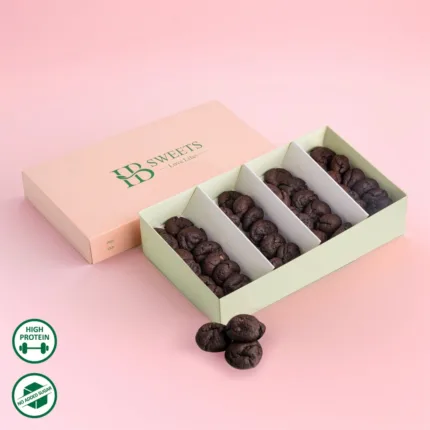
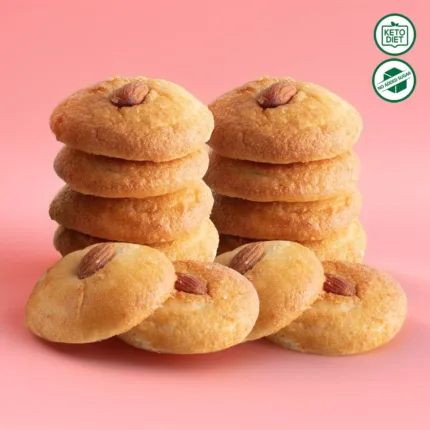
For those seeking a delightful escape, there’s nothing quite like the taste of coconut. Its naturally sweet flavor and vibrant island aroma evoke sandy beaches and crystal-clear waters. But did you know you can capture that tropical essence in a healthy, guilt-free treat? Look no further than homemade coconut cookies!
This guide dives deep into the world of healthy coconut cookies, offering a variety of recipes to tantalize your taste buds and cater to different dietary needs. From chewy classics to grain-free wonders, get ready to transform your kitchen into a haven of wholesome indulgence.
Classic Chewy Coconut Cookies with a Healthy Twist
These cookies are a delightful ode to tradition, boasting the irresistible chew we all know and love. However, we’ve swapped out some ingredients for healthier alternatives, making them perfect for a satisfying snack or a sweet ending to a light meal.
Ingredients:
- 1 ½ cups unsweetened shredded coconut (medium or large flakes)
- ½ cup rolled oats
- ½ cup all-purpose flour (or gluten-free flour blend for a gluten-free option)
- ½ teaspoon baking soda
- ½ teaspoon ground cinnamon
- ¼ teaspoon sea salt
- ⅓ cup unsalted butter, softened
- ½ cup packed light brown sugar
- 1 large egg, at room temperature
- 1 teaspoon pure vanilla extract
- ¼ cup pure maple syrup
Instructions:
- Preheat your oven to 350°F (175°C) and line a baking sheet with parchment paper.
- In a medium bowl, whisk together the dry ingredients: coconut, oats, flour, baking soda, cinnamon, and salt.
- In a separate bowl, cream together the softened butter and brown sugar until light and fluffy. Beat in the egg and vanilla extract until well combined.
- Gradually add the dry ingredients to the wet ingredients, mixing until just combined. Don’t overmix!
- Stir in the maple syrup until fully incorporated. The dough will be thick and may seem slightly dry.
- Using a rounded tablespoon or cookie scoop, portion the dough onto the prepared baking sheet, leaving about 2 inches between each cookie for spreading.
- Bake for 10-12 minutes, or until the edges are golden brown and the centers are slightly set. The cookies will continue to firm up as they cool.
- Let the cookies cool completely on the baking sheet for a few minutes before transferring them to a wire rack to cool completely.
Tips:
- For an extra chewy texture, reduce the baking time by 1 minute.
- For a touch of decadence, drizzle melted dark chocolate over the cooled cookies.
- Feeling adventurous? Add chopped nuts, dried fruit, or a pinch of sea salt to the dough for a flavor twist.
Grain-Free Coconut Cookies for the Paleo Palate
These cookies are a dream come true for those following a Paleo or grain-free lifestyle. With a base of almond flour and naturally sweet ingredients, they deliver a satisfying crunch and a burst of coconut flavor.
Ingredients:
- 1 ¾ cups almond flour
- ½ cup unsweetened shredded coconut (medium or large flakes)
- ¼ teaspoon baking soda
- ¼ teaspoon ground cinnamon
- ¼ teaspoon sea salt
- ¼ cup unsalted butter, softened
- ½ cup honey
- 1 large egg, at room temperature
- 1 teaspoon vanilla extract
Instructions:
- Preheat your oven to 350°F (175°C) and line a baking sheet with parchment paper.
- In a medium bowl, whisk together the almond flour, coconut, baking soda, cinnamon, and salt.
- In a separate bowl, cream together the softened butter and honey until light and fluffy. Beat in the egg and vanilla extract until well combined.
- Gradually add the dry ingredients to the wet ingredients, mixing until just combined. Don’t overmix! The dough will be thick and slightly crumbly.
- Using a rounded tablespoon or cookie scoop, portion the dough onto the prepared baking sheet, leaving about 2 inches between each cookie for spreading.
- Gently press down on each dough ball with the back of a spoon to flatten slightly.
- Bake for 10-12 minutes, or until the edges are golden brown and the centers are set.
- Let the cookies cool completely on the baking sheet for a few minutes before transferring them to a wire rack to cool completely.
Tips:
- For a chewier texture, add 1 tablespoon of melted coconut oil to the dough.
- If the dough feels too dry, add 1 tablespoon of melted coconut oil or honey at a time until it reaches a workable consistency.
- Experiment with different nut flours like cashew or hazelnut flour for a flavor variation
Vegan Coconut Bliss Balls: A No-Bake Delight
These bite-sized treats are perfect for those seeking a vegan and gluten-free option. Packed with wholesome ingredients like dates and nut butter, they offer a burst of energy and satisfy your sweet tooth without any added sugar or refined flours.
Ingredients:
- 1 ½ cups unsweetened shredded coconut (medium or large flakes)
- 1 cup pitted Medjool dates
- ½ cup raw almonds
- ¼ cup raw cashews
- ¼ cup unsweetened almond butter
- 2 tablespoons melted coconut oil
- 1 teaspoon vanilla extract
- Pinch of sea salt (optional)
Instructions:
- In a food processor, pulse the almonds and cashews until finely ground. You can also use a high-powered blender for this step.
- Add the dates, coconut, almond butter, melted coconut oil, vanilla extract, and optional sea salt to the food processor. Process until a sticky dough forms that comes together when pressed.
- If the mixture is too dry, add 1 tablespoon of melted coconut oil at a time and process again until it reaches the desired consistency.
- Using a tablespoon or your hands, scoop out the dough and roll it into bite-sized balls.
- Roll the balls in additional shredded coconut for a delightful textural contrast, or leave them plain.
- Store the bliss balls in an airtight container in the refrigerator for up to a week.
Tips:
- If Medjool dates are unavailable, use another variety of soft, sticky dates. You may need to adjust the amount depending on the sweetness and moisture content of the dates you use.
- For a richer chocolate flavor, dip the rolled bliss balls in melted dark chocolate before refrigerating.
- Want to add a protein boost? Add a scoop of your favorite plant-based protein powder to the food processor along with the other ingredients.
-
 Mix Box79.00 AED
 -
 Fig Tree Cookie49.00 AED
 -
 Gym Buddy Protein Cookie Box59.00 AED
Spiced Coconut Macaroons: A Sophisticated Treat
These elegant cookies are a delightful fusion of textures and flavors. The crisp exteriors give way to a soft and chewy coconut center, infused with warm spices for a truly sophisticated treat.
Ingredients:
- 2 cups unsweetened shredded coconut (medium or large flakes)
- ½ cup almond flour
- ¼ teaspoon baking soda
- ¼ teaspoon ground cinnamon
- ¼ teaspoon ground nutmeg
- ¼ teaspoon ground ginger
- Pinch of sea salt
- 3 large egg whites, at room temperature
- ½ cup granulated sugar
- ¼ cup packed light brown sugar
Instructions:
- Preheat your oven to 325°F (165°C) and line a baking sheet with parchment paper.
- In a medium bowl, whisk together the coconut, almond flour, baking soda, cinnamon, nutmeg, ginger, and salt.
- In a separate bowl, using an electric mixer fitted with the whisk attachment, beat the egg whites on medium speed until frothy. Gradually add the granulated sugar and brown sugar, one tablespoon at a time, while continuing to beat on high speed until stiff peaks form. The meringue should be glossy and hold its shape well.
- Gently fold the dry ingredients into the meringue using a rubber spatula. Be careful not to deflate the meringue.
- Using a rounded tablespoon or cookie scoop, portion the dough onto the prepared baking sheet, leaving about 2 inches between each cookie for spreading.
- Bake for 15-20 minutes, or until the macaroons are golden brown on the outside and slightly soft on the inside.
- Let the macaroons cool completely on the baking sheet for a few minutes before transferring them to a wire rack to cool completely.
Tips:
- For a more uniform shape, pipe the macaroon dough onto the baking sheet using a piping bag fitted with a round tip.
- If you don’t have an electric mixer, you can still make the meringue by hand. Whisk the egg whites vigorously in a clean, grease-free bowl until stiff peaks form. This will take longer than using an electric mixer.
- Drizzle melted dark chocolate over the cooled macaroons for an extra touch of decadence.
With these recipes in your arsenal, you can embark on a delicious journey into the world of healthy coconut cookies. From classic chews to grain-free wonders and sophisticated macaroons, there’s a perfect treat for every craving and dietary need. So, preheat your oven, gather your ingredients, and get ready to create a taste of paradise in your own kitchen!
Bonus Round: Fun Twists and Flavor Adventures
The beauty of homemade cookies lies in their endless customization possibilities. Here are some exciting ways to elevate your healthy coconut cookie creations:
Flavor Infusions:
- Spice it Up: Elevate your classic coconut cookies with a touch of warmth. Add a pinch of cayenne pepper or a sprinkle of chili flakes for a surprising kick.
- Citrus Zest: Infuse your cookies with a burst of sunshine by adding the zest of an orange, lemon, or lime to the dough.
- Floral Flair: For a delicate and sophisticated touch, consider adding a pinch of lavender or rosewater to the dough. Experiment with these in small quantities to avoid overpowering flavors.
- Tropical Twist: Take your taste buds on a vacation by adding a splash of rum extract or a few tablespoons of finely chopped pineapple to the batter.
Mix-Ins and Toppings:
- Chocolate Delights: For the ultimate indulgence, fold in chopped dark chocolate, semi-sweet chocolate chips, or white chocolate chips to the dough. Alternatively, drizzle melted chocolate over the cooled cookies for a decadent finish.
- Nutty Delights: Add a delightful crunch and protein boost with chopped almonds, pecans, walnuts, or hazelnuts. Roasted and salted nuts offer an extra layer of flavor.
- Dried Fruit Medley: Incorporate chopped dried fruits like cranberries, cherries, or chopped apricots for a burst of sweetness and chewy texture.
- Sweet & Savory: For a truly unique twist, try sprinkling the tops of your cookies with a pinch of flaked sea salt before baking. The sweet and salty combination is surprisingly addictive.
Festive Fun:
- Holiday Cheer: Transform your coconut cookies into festive treats by adding seasonal ingredients. During the holidays, consider adding chopped dried cranberries, chopped candied orange peel, or a sprinkle of cinnamon sugar to the dough.
- Themed Treats: Planning a party? Get creative! For a luau-themed gathering, add a splash of pineapple juice and a maraschino cherry on top of each cookie.
Allergy-Friendly Options:
- Nut-Free: If you have nut allergies, there are plenty of delicious substitutes. Swap out nut flours and chopped nuts for sunflower seed butter, sunflower seeds, or even hemp seeds.
- Gluten-Free: Ensure your oats are certified gluten-free and use gluten-free flour blends in the recipes that call for flour. Many commercially available nut flours are naturally gluten-free as well.
- Vegan Tweaks: For the vegan macaroons, use an aquafaba (chickpea water) meringue instead of egg whites. Simply whip the reserved liquid from a can of chickpeas until stiff peaks form.
Remember, these are just a starting point! Don’t be afraid to experiment and create your own signature healthy coconut cookie recipe. With a little creativity and these handy tips, you can transform your kitchen into a haven of deliciousness and healthy indulgence.
Pro Tips for Perfect Coconut Cookies: A Baker’s Guide
Here are some additional insights to ensure your coconut cookie creations are not only delicious but also boast the perfect texture and visual appeal:
Mastering the Mix-Ins:
- Size Matters: When adding chopped nuts, dried fruit, or chocolate chips, ensure they are relatively small and evenly distributed throughout the dough. This prevents large chunks from creating uneven baking and potential burning.
- Hydration Matters: Dried fruits tend to absorb moisture over time. If using them, consider soaking them in a little rum or fruit juice for 10 minutes before adding them to the dough. This plumps them up and prevents them from drying out the cookies during baking.
- Coating Chocolate Chips: To prevent chocolate chips from sinking to the bottom of the cookies, toss them in a little bit of flour before adding them to the dough. This creates a barrier that helps them stay evenly distributed throughout the cookie.
Baking for Perfection:
- Oven Temperature Matters: Even a slight variation in oven temperature can significantly impact the outcome of your cookies. Invest in an oven thermometer to ensure your oven is preheated to the correct temperature before baking.
- Uniformity is Key: For consistent baking, use a cookie scoop to portion the dough onto your baking sheet. This ensures all the cookies are roughly the same size and bake evenly.
- Leave Room to Breathe: Don’t crowd your baking sheet! Leave enough space between each cookie to allow for spreading during baking. This prevents the cookies from merging into one giant cookie monster.
- The Golden Rule: Don’t overbake! The cookies will continue to firm up as they cool. Look for the edges to be golden brown and the centers to be slightly set but not completely dry.
Cooling and Storage:
- Let Them Rest: Once the cookies are done baking, allow them to cool on the baking sheet for a few minutes before transferring them to a wire rack to cool completely. This allows the residual heat to distribute evenly and prevents them from becoming soggy.
- Crispy or Chewy? The cooling process also plays a role in the final texture of your cookies. Letting them cool completely on the wire rack will result in a crispier cookie. If you prefer a chewier texture, transfer them to an airtight container while they are still slightly warm. The trapped steam will soften them up.
- Storage Solutions: Store your cooled cookies in an airtight container at room temperature for up to 3 days. For longer storage, you can freeze them for up to 2 months. Simply thaw them at room temperature before enjoying.
Presentation Power:
- A Feast for the Eyes: A little extra effort can go a long way in creating visually appealing cookies. Drizzle melted chocolate over the cooled cookies, sprinkle them with toasted coconut flakes, or arrange them on a decorative platter for an impressive presentation.
- Gift-Giving Delights: Homemade cookies are thoughtful and delicious gifts. Package your cooled cookies in beautiful tins, decorative boxes, or cellophane bags tied with colorful ribbons for a delightful homemade present.
With these baking tips and tricks in your arsenal, you’ll be well on your way to becoming a coconut cookie connoisseur. So, unleash your inner baker, experiment with flavors and techniques, and create a batch of healthy coconut cookies that are not only delicious but also a feast for the eyes!
-
 Baadaam Keto Cookie Box94.00 AED
 -
 Baadaam Keto Cookies52.00 AED
 -
 Coin Cookie49.00 AED


